Building and Validating an AWS Backup Strategy with Resilience Hub
Most teams treat backup as a checkbox. A retention policy gets set, scheduled snapshots run quietly in the background, and nobody thinks about it again until something breaks. The problem is that an untested backup is not a backup strategy - it's a false sense of security.
This post covers two things I built and tested in AWS: a centralised backup strategy across EC2 and S3 using AWS Backup, and a formal resilience assessment using AWS Resilience Hub. Neither of these is particularly complex to set up, but the decisions behind them matter more than the configuration itself.
What We Built
- A centralised AWS Backup vault with a customer-managed KMS key
- A tiered backup plan covering EC2 (EBS) and S3, with tag-based resource selection
- A tested restore procedure with a measured EC2 RTO
- A Resilience Hub application with a defined RTO/RPO policy, an initial assessment, and an actioned recommendation
Project 1 - AWS Backup Strategy
The Problem
Individual AWS services have their own snapshot mechanisms - EBS snapshots, RDS automated backups, S3 versioning. They all work, but they're isolated. There's no unified view of what's protected, no consistent retention policy, and no straightforward way to prove to an auditor that your recovery posture is coherent.
AWS Backup solves this by acting as an orchestration layer across services. One vault, one plan, one place to look.
Setup at a Glance
- KMS key - AWS KMS > Customer-managed keys > Create key. Named
backup-dev-key. Symmetric key, Encrypt and Decrypt. Key policy scoped to the AWS Backup service principal and the admin IAM user. - Backup vault - AWS Backup > Backup vaults > Create backup vault. Named
backup-vault-dev, assigned the customer-managed KMS key above. - Backup plan - AWS Backup > Backup plans > Create plan > Build a new plan. Named
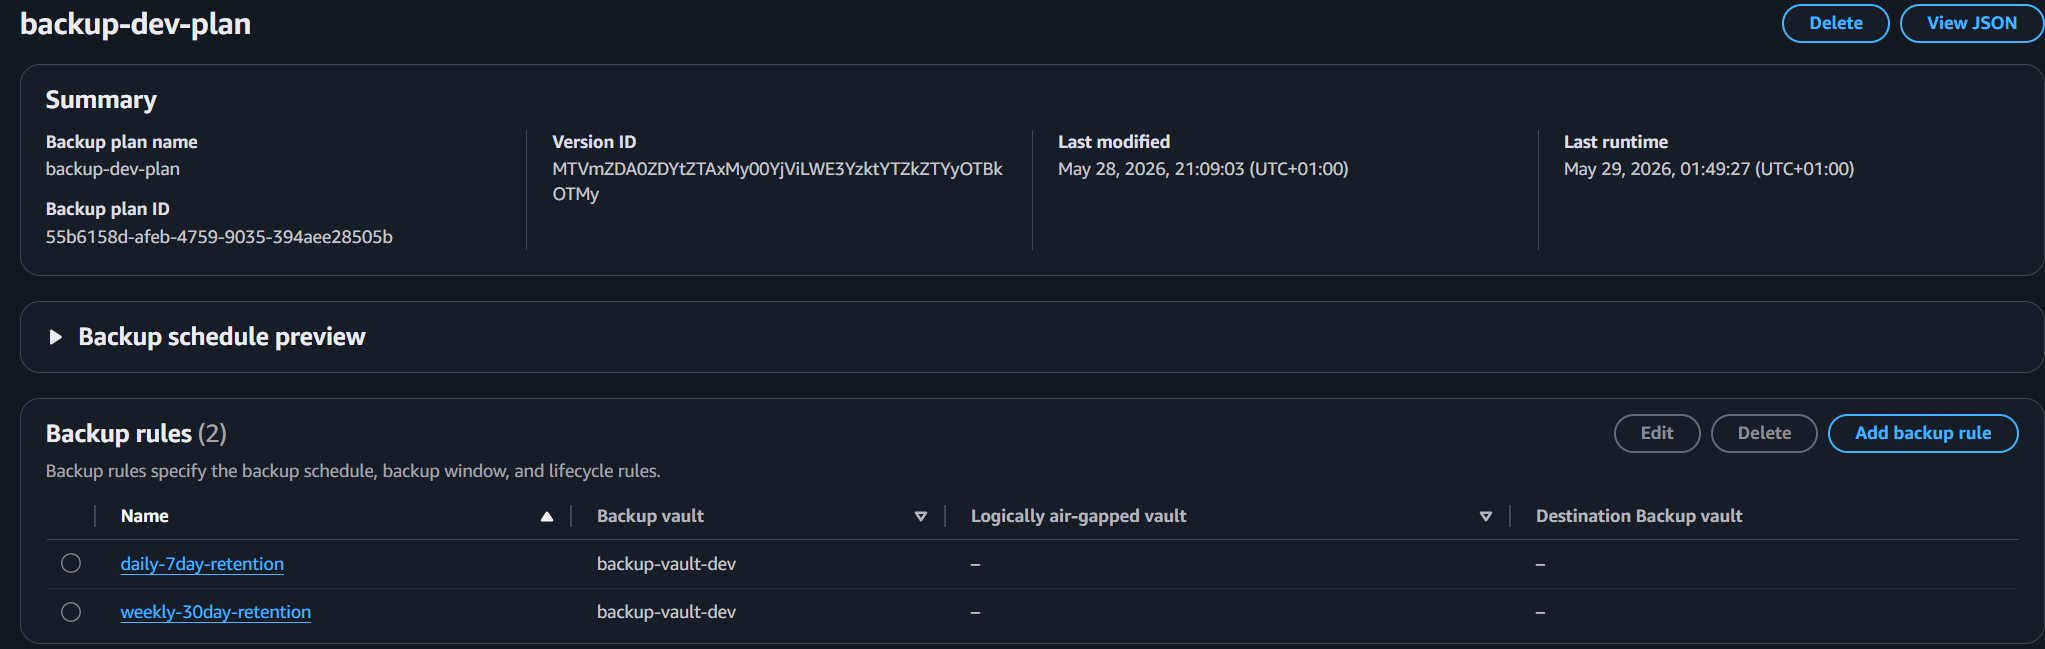
backup-dev-plan. Two rules added, both targetingbackup-vault-dev:Field daily-7-day-retentionweekly-30-day-retentionBackup frequency Daily Weekly Start within 8 hours 8 hours Complete within 7 days 7 days Total retention 7 days 30 days - Resource assignment - Named
backup-lab-selection. IAM role: Default role (selected by default). Resource selection: Include all resource types. Under tags, add keyBackup/ valuetrue, then click Assign resources. - IAM - Under the resource assignment, select Default role. If
AWSBackupDefaultServiceRoledoes not yet exist in the account, AWS will create it automatically with the correct permissions. Two managed policies are attached by default:AWSBackupServiceRolePolicyForBackup(creating recovery points) andAWSBackupServiceRolePolicyForRestores(restoring them). For S3,AWSBackupServiceRolePolicyForS3BackupandAWSBackupServiceRolePolicyForS3Restorealso need to be attached - this is a common oversight covered in the S3 section below.
Vault Design
The first decision was the encryption key. AWS Backup defaults to an AWS-managed key, which is fine for many use cases. For this setup, I chose a customer-managed KMS key instead.
The reason is control. With a customer-managed key you can define key policies, restrict who can decrypt recovery points, rotate the key on your own schedule, and get a full audit trail via CloudTrail. In a regulated environment - financial services, healthcare - that level of control is often a compliance requirement, not a preference. It costs $1 per month. The trade-off is straightforward.
Backup Plan: Two Rules, One Decision
The backup plan uses two rules rather than one:
- Daily backups with 7-day retention - for operational recovery. If a deployment breaks something or a file gets deleted, you want yesterday's state. Short window, low storage cost, fast to restore.
- Weekly backups with 30-day retention - for compliance and longer-term recovery. If a problem goes undetected for two weeks - corrupted data, a subtle misconfiguration - you still have a restore point. This also maps to common audit requirements.
A single daily backup with a long retention period would technically cover both scenarios, but the cost compounds quickly. Tiering the retention keeps storage costs proportional to the actual recovery value of each point in time.
Tag-Based Resource Selection
Rather than hardcoding resource ARNs into the backup plan, I used tag-based selection. Any resource tagged Backup: true is automatically included in the plan.
This matters at scale. If you're managing dozens of resources across multiple services, ARN-based selection becomes a maintenance burden - every new resource requires a plan update. Tag-based selection is self-service: the resource is created with the right tag and it's automatically protected. It also makes the backup policy auditable - you can query which resources carry the tag and verify coverage in one pass.
Testing the Restore
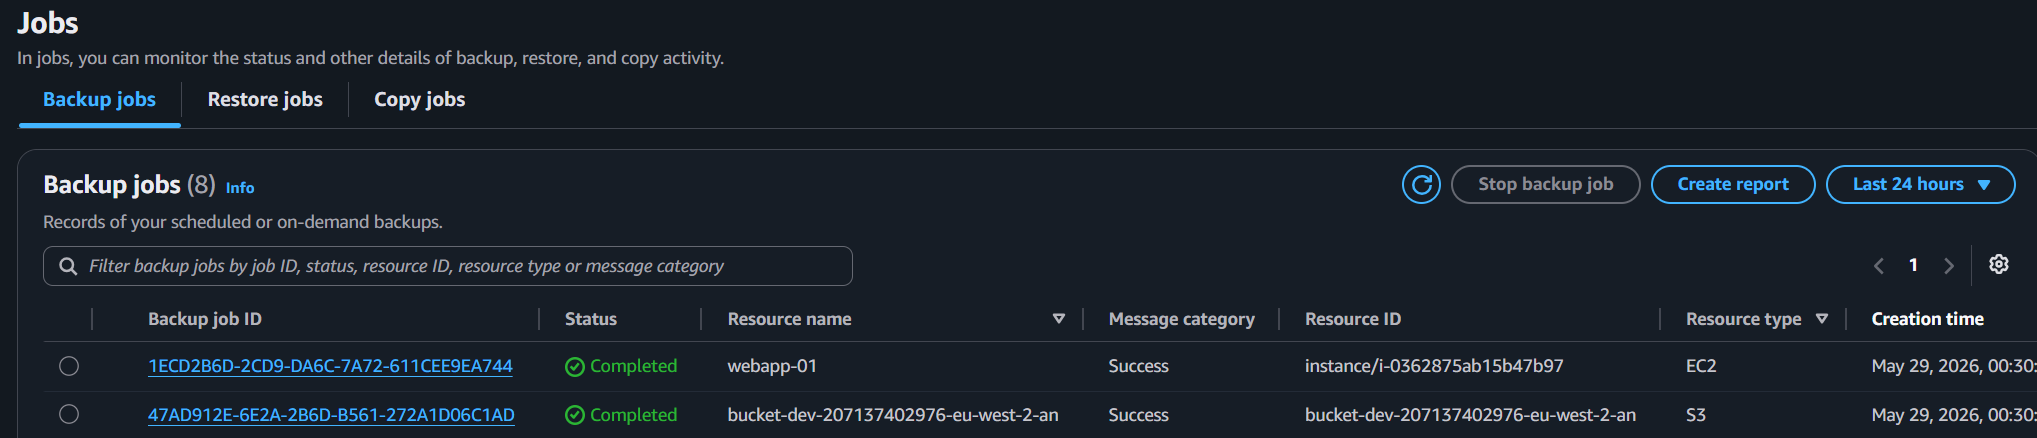
The backup jobs for both EC2 (webapp-01) and S3 completed successfully.
Completing a backup is the easy part. The only thing that matters is whether you can restore from it under pressure. Before running the test, confirm there is a completed recovery point in backup-vault-dev – if the scheduled job shows as aborted, trigger an on-demand backup from the vault first. Here is how the test was run:
- Simulate failure - EC2 > select
web-dev-01> Instance state > Terminate. Note the exact time – this is T0. - Restore - AWS Backup > Backup vaults >
backup-vault-dev> find the EC2 recovery point > Restore. Instance type:t2.micro. IAM role: Default role. Note the exact time you click Restore – this is T1. - Confirm recovery - Go to EC2 and wait for the new instance to reach running state. Note that time – this is T2.
RTO = T2 - T0.
| Event | Time |
|---|---|
| T0 - instance terminated | 22:36 |
| T1 - restore initiated | 22:38 |
| T2 - instance running | 22:39 |
EC2 RTO: 3 minutes.
The restored instance came up with all data intact – confirming the recovery point was consistent and the restore procedure worked as expected.
That number is specific to this instance size and snapshot state. In a production context, you'd add application startup time, health check validation, and any DNS or load balancer propagation on top. The infrastructure recovery itself was 3 minutes - what that means for service RTO depends on the application layer above it.
A Note on S3 Restore
S3 restore via AWS Backup works differently from EC2. It restores to a new bucket rather than back into the existing one, which means you need the restore role to have the right permissions to create a bucket in the target account - a common oversight on first setup.
For object-level recovery, S3 versioning handles it more cleanly: delete the object, remove the delete marker, file is back. For full bucket recovery AWS Backup is the right tool, but the IAM permissions need to be right upfront.
Project 2 - AWS Resilience Hub Assessment
The Problem
Having backups in place answers one question: can we recover data? Resilience Hub answers a different question: does this workload actually meet its defined RTO and RPO targets, and what's missing?
The distinction is important. A workload can have backups and still fail a resilience assessment - because it has no alerting, no runbooks, no tested failure scenarios. Resilience Hub surfaces those gaps systematically.
Setup at a Glance
- Create application - AWS Resilience Hub > Applications > Add application. Named
backup-lab-app. Resources imported using the sameBackup: truetag from Project 1, which pulled in the EC2 instance and S3 bucket automatically. - Resiliency policy - Created a new policy with RTO 1 hour / RPO 24 hours, tier set to Non-critical. Attached to the application before publishing.
- IAM - Resilience Hub requires a service role with
AWSResilienceHubAsssessmentExecutionPolicyattached. This is created automatically on first use if you allow it, or you can pre-create it manually and pass the role ARN when setting up the application. - Initial assessment - Published the application, then ran the assessment from the application dashboard. Score: 40/100.
- Implement recommendation - CloudWatch > Alarms > Create alarm. Used the exact name from the Resilience Hub recommendation:
AWSResilienceHub-Ec2CpuUtilizationAlarm_2020-07-13. Threshold set to 90% CPU utilisation over a 5-minute period. - Reassessment - Re-ran the assessment from the Resilience Hub application dashboard. Score updated to 41/100.
Defining the Policy
Before running an assessment, you define a resiliency policy with explicit RTO and RPO targets. I used:
- RTO: 1 hour
- RPO: 24 hours
These are appropriate for a non-critical workload. In a financial services context you'd tighten this considerably - a trading platform or payment service might require an RTO measured in minutes and an RPO of near-zero. The policy tier drives the strictness of the assessment, so getting it right for the workload type matters.
Initial Assessment: 40/100
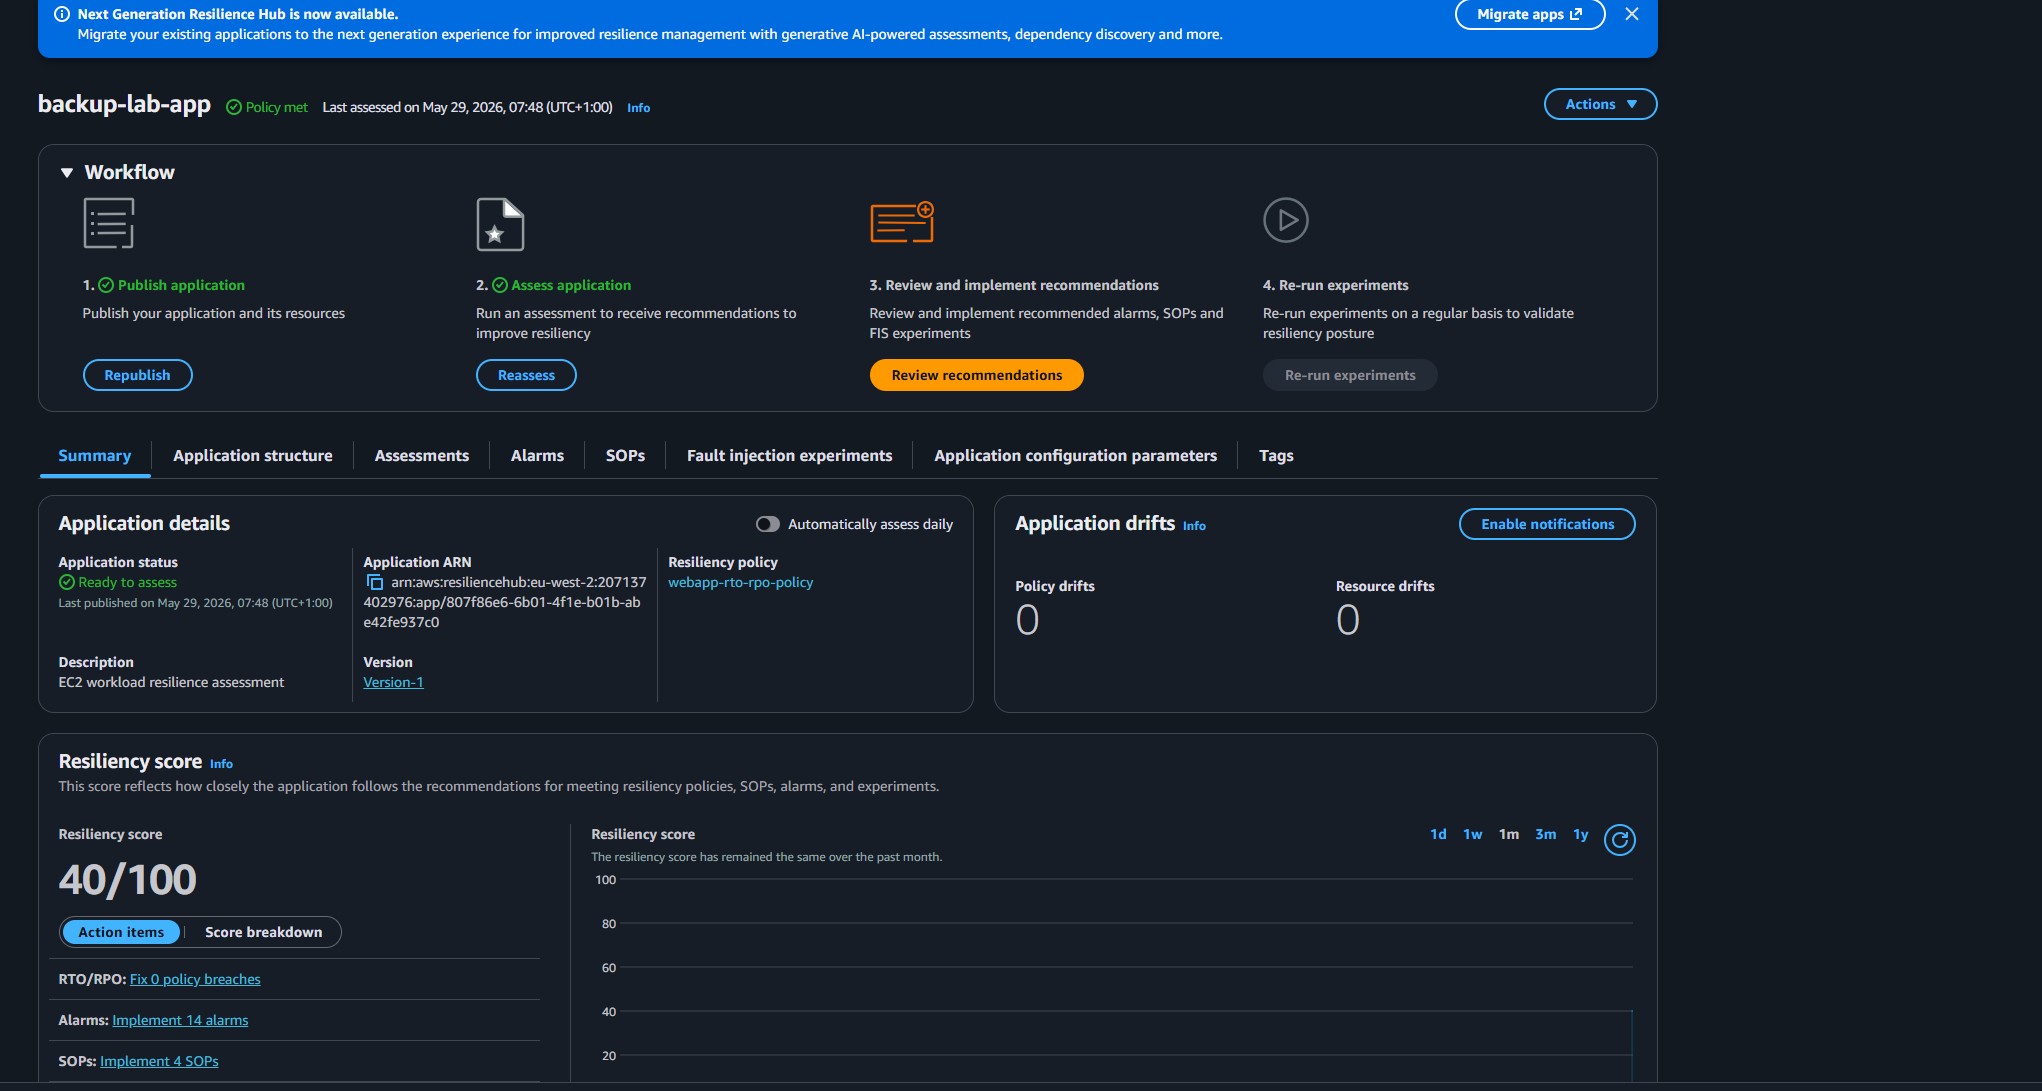
The initial score was 40/100. The RTO/RPO policy showed zero breaches - the workload could theoretically meet the recovery targets. The gaps were operational: 14 recommended CloudWatch alarms not implemented, 4 SOPs missing.
This is a realistic result for a single EC2 instance with no auto-recovery configured. The score reflects operational readiness, not just whether the infrastructure can recover. A workload with no alerting has no way of knowing it needs to recover in the first place.
Actioning a Recommendation
From the 14 recommended alarms, I implemented the CPU utilisation alarm: AWSResilienceHub-Ec2CpuUtilizationAlarm_2020-07-13.
The naming convention matters here. Resilience Hub discovers implemented alarms by exact name match against its recommendation templates. If the name doesn't match precisely, the alarm won't register as implemented and the score won't move. Worth knowing before you spend time creating alarms that don't get picked up.
Reassessment: 41/100
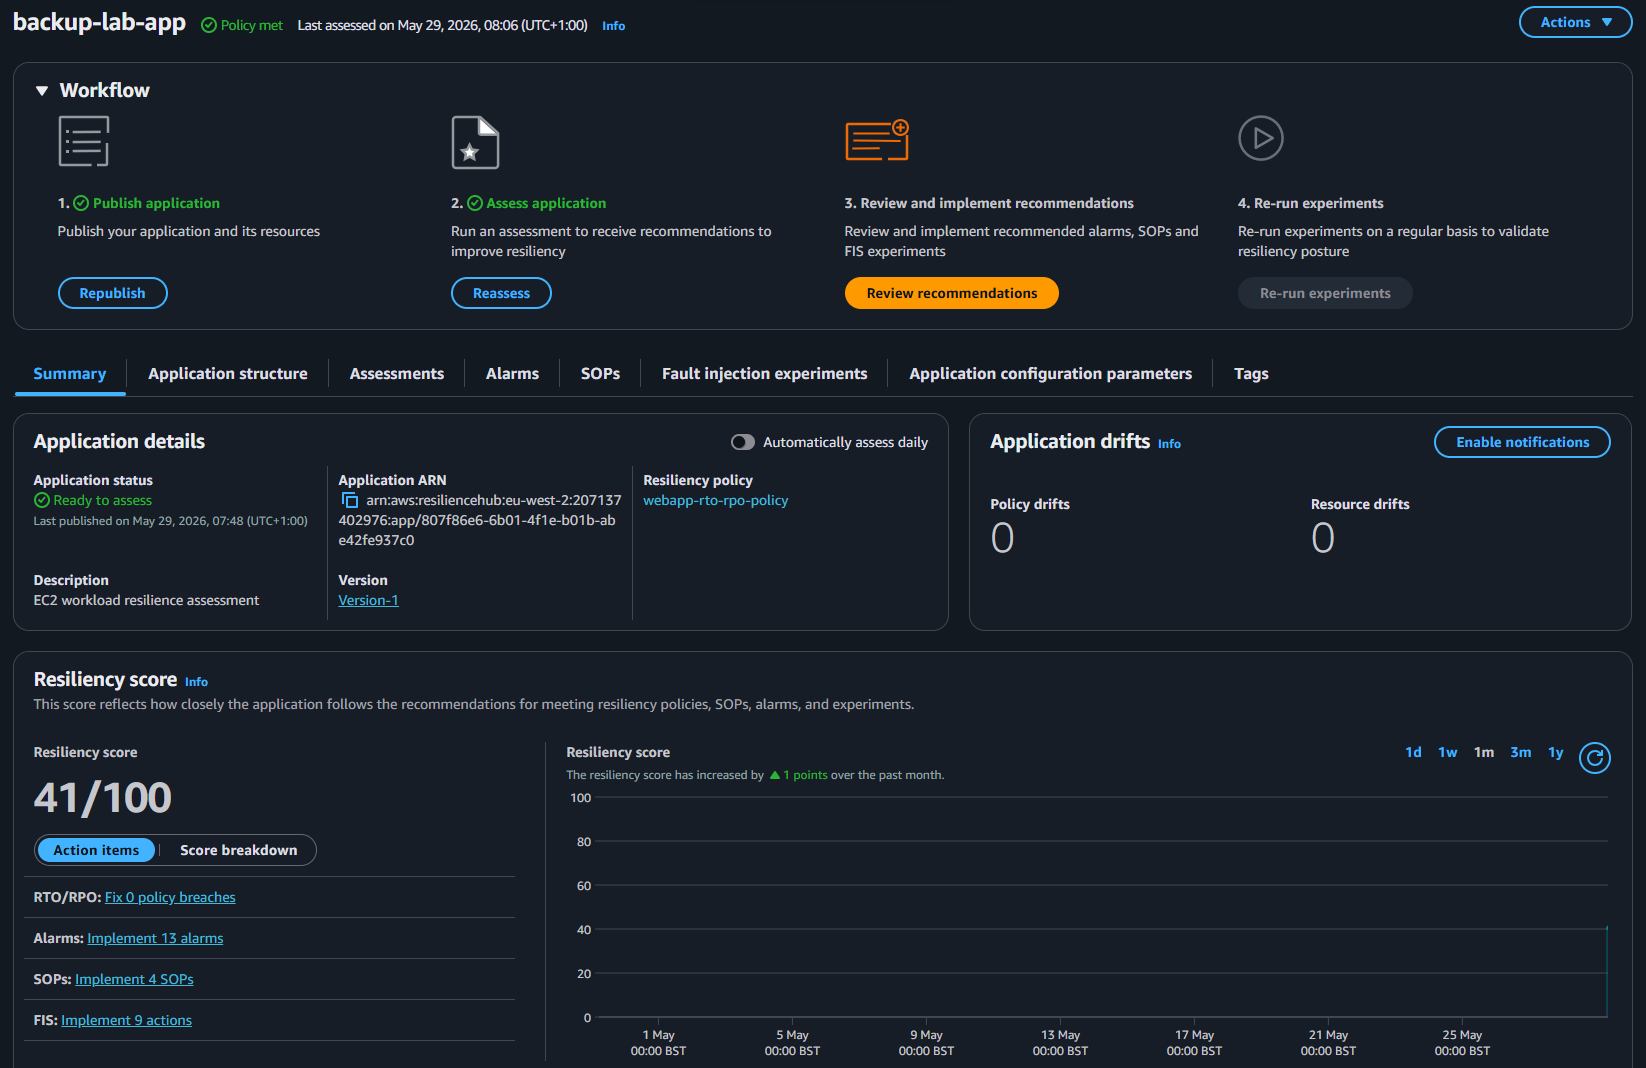
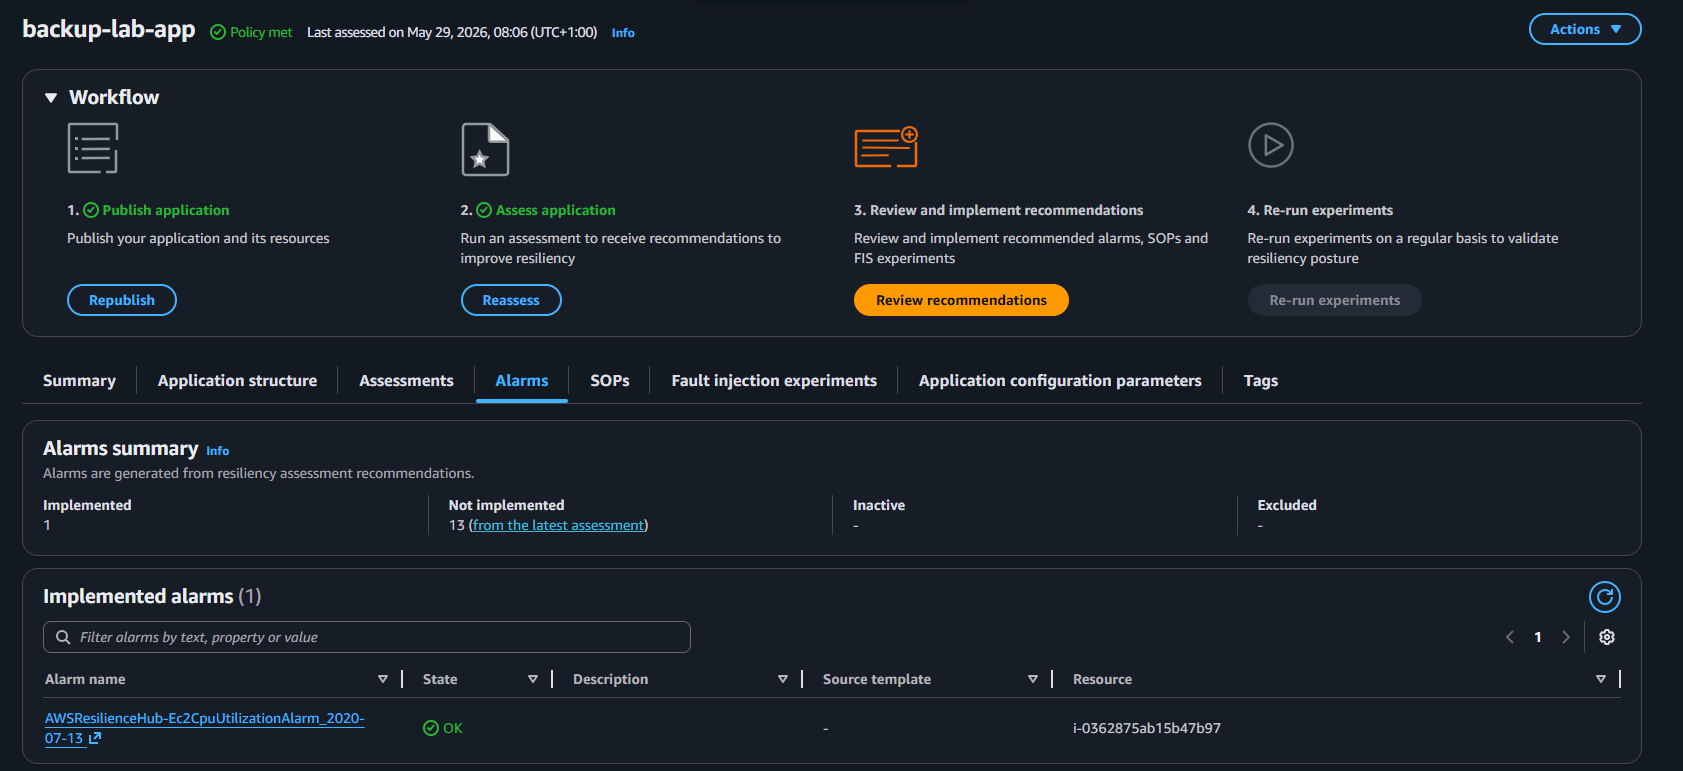
Score moved from 40 to 41. One alarm implemented, 13 remaining. The value here isn't the number - it's the closed loop. Assessment identified a gap, a control was implemented, reassessment confirmed it. That's the workflow.
In production you'd work through the full recommendation set systematically: alarms first, then SOPs, then FIS experiments for chaos validation. Each pass raises the score and - more importantly - raises the operational confidence in the workload.
What's Next
The logical next steps from here are chaos testing with AWS Fault Injection Service - injecting EC2 failures and AZ-level disruptions to validate that the recovery procedures actually work under fire, not just in theory. Alongside that, RDS backup validation with a tested restore and measured RTO, and Vault Lock configuration for immutable backup retention to satisfy compliance requirements around tamper-proof recovery points. Those will be covered in a follow-up post.
Takeaways
A few things worth carrying from this:
Backup strategy is about recovery confidence, not backup frequency. The retention tiers, the tag-based selection, the KMS key - those are all in service of being able to answer "can we recover, and how fast?" with a real number rather than a guess.
Resilience Hub is most useful as a gap analysis tool. The score itself is less important than the list of what's missing. Work the list.
Test your restores. Every time, not just once.
If an article saved you time or helped you solve a problem, buying me a coffee is a great way to show your support — and keeps me motivated to write more.

Found this useful? Follow the blog to stay informed on new posts — it's free. Have questions or want to discuss further? Leave a comment below.
